Joyent has recently announced their new Triton Docker container hosting service. There are several advantages of running Docker containers on Triton rather than on a more traditional cloud hosting platform:
- Better performance since there is no hardware level virtualization overhead. Your containers run on bare metal.
- Simplified networking between containers. Each container gets its own private (and optionally public) ip address.
- Hosts are abstracted away – you just deploy into the “container cloud”, and don’t care which host your container is running on.
For more details, check out Bryan Cantrill’s talk about Docker and the Future of Containers in Production.
Let’s give it a spin with a “hello world” container, and then with a cluster of Couchbase servers.
Sign up for a Joyent account
Follow the signup instructions on the Joyent website.
You will also need to add your SSH key to your account.
Upgrade Docker client to 1.4.1 or later
Check your version of Docker with:
|
1 2 |
$ docker --version Docker version 1.0.1, build 990021a |
If you are on a version before 1.4.1 (like I was), you can upgrade Docker via the boot2docker installers.
Joyent + Docker setup
Get the sdc-docker repo (sdc == Smart Data Center):
|
1 |
$ git clone https://github.com/joyent/sdc-docker.git |
Perform setup via:
|
1 2 |
$ cd sdc-docker $ ./tools/sdc-docker-setup.sh -k 165.225.168.22 $ACCOUNT ~/.ssh/$PRIVATE_KEY_FILE |
Replace values as follows:
- $ACCOUNT: you can get this by logging into the Joyent web ui and going to the Account menu from the pulldown in the top-right corner. Find the Username field, and use that
- $PRIVATE_KEY_FILE: the name of the file where your private key is stored, typically this will be
id_rsa
Run the command and you should see the following output:
|
1 2 3 4 5 6 7 8 9 10 11 12 13 14 15 16 17 18 19 20 |
Setting up Docker client for SDC using: CloudAPI: https://165.225.168.22 Account: Key: /home/ubuntu/.ssh/id_rsa [..snip..] Wrote certificate files to /home/ubuntu/.sdc/docker/ Docker service endpoint is: tcp://:2376 * * * Success. Set your environment as follows: export DOCKER_CERT_PATH=/home/ubuntu/.sdc/docker/ export DOCKER_HOST=tcp://:2376 alias docker="docker --tls" Then you should be able to run 'docker info' and see your account name 'SDCAccount: ' in the output. |
Export environment variables
As the output above suggests, copy and paste the commands from the output. Here’s an example of what that will look like (but you should copy and paste from your command output, not the snippet below):
|
1 2 3 |
$ export DOCKER_CERT_PATH=/home/ubuntu/.sdc/docker/ $ export DOCKER_HOST=tcp://:2376 $ alias docker="docker --tls" |
Docker Hello World
Let’s spin up an Ubuntu docker image that says hello world.
Remember, you’re running the Docker client on your workstation, not in the cloud. Here’s an overview on what’s going to be happening:

To start the docker container::
|
1 |
$ docker run --rm ubuntu:14.04 echo "Hello Docker World, from Joyent" |
You should see the following output:
|
1 2 3 4 |
Unable to find image 'ubuntu:14.04' locally Pulling repository library/ubuntu ... Hello Docker World, from Joyent |
Also, since the --rm flag was passed, the container will have been removed after exiting. You can verify this by running docker ps -a. This is important because stopped containers incur charges on Joyent.
Congratulations! You’ve gotten a “hello world” Docker container running on Joyent.
Run Couchbase Server containers
Now it’s time to run Couchbase Server.
To kick off three Couchbase Server containers, run:
|
1 2 3 4 |
$ for i in `seq 1 3`; do echo "Starting container $i"; export container_$i=$(docker run --name couchbase-server-$i -d -P couchbase/server); done |
To confirm the containers are up, run:
|
1 |
$ docker ps |
and you should see:
|
1 2 3 4 |
CONTAINER ID IMAGE COMMAND CREATED STATUS PORTS NAMES 5bea8901814c couchbase/server "couchbase-start" 3 minutes ago Up 2 minutes couchbase-server-1 bef1f2f32726 couchbase/server "couchbase-start" 2 minutes ago Up 2 minutes couchbase-server-2 6f4e2a1e8e63 couchbase/server "couchbase-start" 2 minutes ago Up About a minute couchbase-server-3 |
At this point you will have environment variables defined with the container ids of each container. You can check this by running:
|
1 2 3 4 |
$ echo $container_1 && echo $container_2 && echo $container_3 21264e44d66b4004b4828b7ae408979e7f71924aadab435aa9de662024a37b0e ff9fb4db7b304e769f694802e6a072656825aa2059604ba4ab4d579bd2e5d18d 0c6f8ca2951448e497d7e12026dcae4aeaf990ec51e047cf9d8b2cbdd9bd7668 |
Get public ip addresses of the containers
Each container will have two IP addresses assigned:
- A public IP, accessible from anywhere
- A private IP, only accessible from containers/machines in your Joyent account
To get the public IP, we can use the Docker client. (to get the private IP, you need to use the Joyent SmartDataCenter tools, which is described below)
|
1 2 3 |
$ container_1_ip=`docker inspect $container_1 | grep -i IPAddress | awk -F: '{print $2}' | grep -oE "b([0-9]{1,3}.){3}[0-9]{1,3}b"` $ container_2_ip=`docker inspect $container_2 | grep -i IPAddress | awk -F: '{print $2}' | grep -oE "b([0-9]{1,3}.){3}[0-9]{1,3}b"` $ container_3_ip=`docker inspect $container_3 | grep -i IPAddress | awk -F: '{print $2}' | grep -oE "b([0-9]{1,3}.){3}[0-9]{1,3}b"` |
You will now have the public IP addresses of each container defined in environment variables. You can check that it worked via:
|
1 2 3 4 |
$ echo $container_1_ip && echo $container_2_ip && echo $container_3_ip 165.225.185.11 165.225.185.12 165.225.185.13 |
Connect to Couchbase Web UI
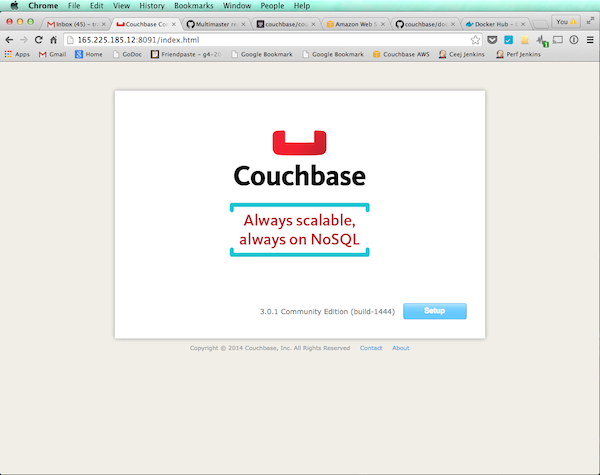
Open your browser to $container_1_ip:8091 and you should see the Couchbase welcome screen:

At this point, it’s possible to set up the cluster by going to each Couchbase node’s Web UI and following the Setup Wizard. However, in case you want to automate this in the future, let’s do this over the command line instead.
Setup first Couchbase node
Let’s arbitrarily pick container_1 as the first node in the cluster. This node is special in the sense that other nodes will join it.
The following command performs these operations:
- Sets the Administrator’s username and password to Administrator / password (you should change this)
- Sets the cluster RAM size to 600 MB
Note: the -u admin -p password should be left as-is, since that is just passing in the default admin name and password for auth purposes.
|
1 2 3 4 5 6 |
$ docker run --rm --entrypoint=/opt/couchbase/bin/couchbase-cli couchbase/server cluster-init -c $container_1_ip --cluster-init-username=Administrator --cluster-init-password=password --cluster-init-ramsize=600 -u admin -p password |
You should see a response like:
|
1 |
SUCCESS: init 165.225.185.11 |
Create a default bucket
A bucket is equivalent to a database in typical RDMS systems.
|
1 2 3 4 5 6 7 8 |
$ docker run --rm --entrypoint=/opt/couchbase/bin/couchbase-cli couchbase/server bucket-create -c $container_1_ip:8091 --bucket=default --bucket-type=couchbase --bucket-port=11211 --bucket-ramsize=600 --bucket-replica=1 -u Administrator -p password |
You should see:
|
1 |
SUCCESS: bucket-create |
Add 2nd Couchbase node
Add in the second Couchbase node with this command
|
1 2 3 4 5 6 |
$ docker run --rm --entrypoint=/opt/couchbase/bin/couchbase-cli couchbase/server server-add -c $container_1_ip -u Administrator -p password --server-add $container_2_ip --server-add-username Administrator --server-add-password password |
You should see:
|
1 2 |
SUCCESS: server-add 165.225.185.12:8091 |
To verify it was added, run:
|
1 2 3 |
$ docker run --rm --entrypoint=/opt/couchbase/bin/couchbase-cli couchbase/server server-list -c $container_1_ip -u Administrator -p password |
which should return the list of Couchbase Server nodes that are now part of the cluster:
|
1 2 |
ns_1@165.225.185.11 165.225.185.11:8091 healthy active ns_1@165.225.185.12 165.225.185.12:8091 healthy inactiveAdded |
Add 3rd Couchbase node and rebalance
In this step we will:
- Add the 3rd Couchbase node
- Trigger a “rebalance”, which distributes the (empty) bucket’s data across the cluster
|
1 2 3 4 5 6 |
$ docker run --rm --entrypoint=/opt/couchbase/bin/couchbase-cli couchbase/server rebalance -c $container_1_ip -u Administrator -p password --server-add $container_3_ip --server-add-username Administrator --server-add-password password |
You should see:
|
1 2 3 4 5 6 |
INFO: rebalancing . . . . . . . . . . . . . . . . . . . . . . . . . . . . . . . . . . . . . . . . . . . . . . . . . . . . . . . . . SUCCESS: rebalanced cluster close failed in file object destructor: Error in sys.excepthook: Original exception was: |
If you see SUCCESS, then it worked. (I’m not sure why the “close failed in file ..” error is happening, but so far it appears that it can be safely ignored.)
Login to Web UI
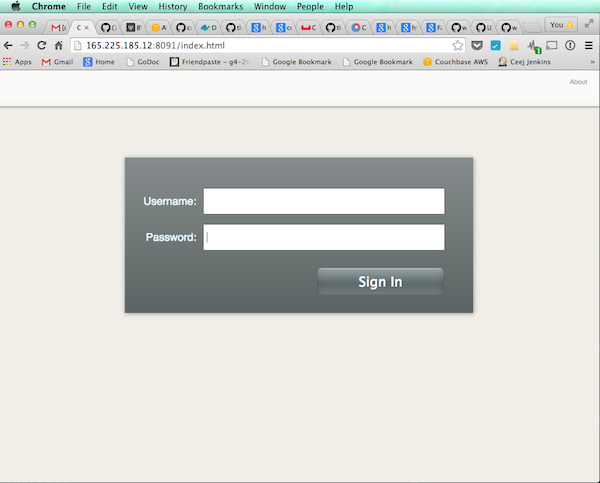
Open your browser to $container_1_ip:8091 and you should see the Coucbase log in screen:

Login with:
- Username: Administrator
- Password: password
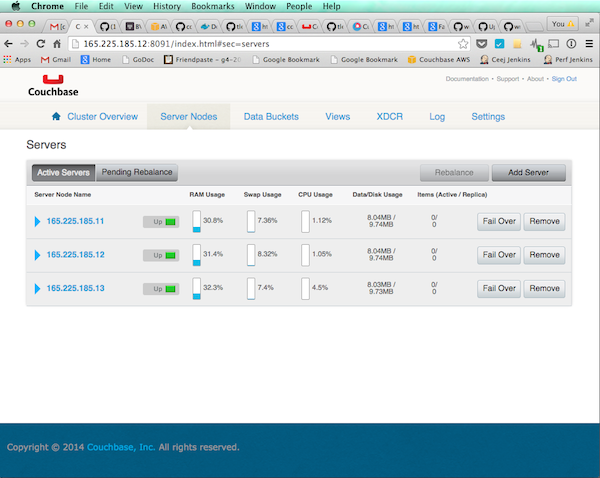
And you should see the Couchbase nodes:

Congratulations! You have a Couchbase Server cluster up and running on Joyent Triton.
Teardown
To stop and remove your Couchbase server containers, run:
|
1 2 |
$ docker stop $container_1 $container_2 $container_3 $ docker rm $container_1 $container_2 $container_3 |
To double check that you no longer have any containers running or in the stopped state, run docker ps -a and you should see an empty list.
Installing the SDC tools (optional)
Installing the Joyent Smart Data Center (SDC) tools will allow you to gain more visibility into your container cluster – for example being able to view the internal IP of each continer.
Here’s how to install the sdc-tools suite.
Install smartdc
First install NodeJS + NPM
Install smartdc:
|
1 2 |
npm install -g smartdc |
Configure environment variables
|
1 2 3 |
$ export SDC_URL=https://us-east-3b.api.joyent.com $ export SDC_ACCOUNT= $ export SDC_KEY_ID=$(ssh-keygen -l -f $HOME/.ssh/id_rsa.pub | awk '{print $2}') |
Replace values as follows:
- ACCOUNT: you can get this by logging into the Joyent web ui and going to the Account menu from the pulldown in the top-right corner. Find the Username field, and use that
List machines
Run sdc-listmachines to list all the containers running under your Joyent account. Your output should look something like this:
|
1 2 3 4 5 6 7 8 9 10 11 12 13 14 15 16 17 18 19 20 21 22 23 24 25 26 27 28 29 |
$ sdc-listmachines [ { "id": "0c6f8ca2-9514-48e4-97d7-e12026dcae4a", "name": "couchbase-server-3", "type": "smartmachine", "state": "running", "image": "335a8046-0749-1174-5666-6f084472b5ef", "ips": [ "192.168.128.32", "165.225.185.13" ], "memory": 1024, "disk": 25600, "metadata": {}, "tags": {}, "created": "2015-03-26T14:50:31.196Z", "updated": "2015-03-26T14:50:45.000Z", "networks": [ "7cfe29d4-e313-4c3b-a967-a28ea34342e9", "178967cb-8d11-4f53-8434-9c91ff819a0d" ], "dataset": "335a8046-0749-1174-5666-6f084472b5ef", "primaryIp": "165.225.185.13", "firewall_enabled": false, "compute_node": "44454c4c-4400-1046-8050-b5c04f383432", "package": "t4-standard-1G" }, ] |
Find private IP of an individual machine
|
1 |
$ sdc-getmachine | json -aH ips | json -aH | egrep "10.|192.” |
References
- Native Docker API vs Joyent Triton API
- https://www.joyent.com/blog/container-service-preview
- https://www.joyent.com/blog/docker-bake-off-aws-vs-joyent
- https://github.com/joyent/sdc-docker
- https://github.com/joyent/sdc-docker/blob/master/docs/divergence.md
