
c = Couchbase.new(“http://localhost:8091/pools/default/buckets/my-bucket”)
I believe it’s safe to say we are mostly all familiar with the above Ruby code. It establishes a connection from the Ruby SDK to a bucket of our choosing inside our Couchbase cluster. There are, of course, multiple ways of writing this line, such as specifying the URI and Port as Ruby Symbols (:pool => "default", :bucket => "my-bucket")etc. The point I am making here is that we write these simple one line commands, and get 1 simple connection to our chosen bucket. But what if our application uses multiple buckets? In this article, I’m going to back to basics, and take you through setting up, and connecting to Multiple Buckets.
Why would I use Multiple Buckets in Couchbase?
Using multiple buckets in Couchbase is an interesting concept. (To me, anyway.)
On the one hand, there are benefits to using multiple buckets, BUT it’s important to remember that, because of Couchbase’ Flexible Schema, we could store JSON docs of any structure in the same bucket, even if every document’s schema was different.
Many Couchbase consumers are now, however, seeing benefits in using multiple Buckets in their applications. For instance, if you are a hosting provider and you want to have different Users using the same Database Server; Buckets can be password protected and would prevent one User from accessing another User’s data.
Some people create multiple buckets for organizational purposes: for example; you could be running two different applications and want the data to be separate or maybe we just want to split data up by category. These are all very reasonable use-cases and by all means, very possible. So now we know why we might use multiple buckets, let’s take a look at How we can connect to, and utilise those buckets.
Connecting to Multiple Buckets in Couchbase:
Let’s dive in. Open up your Admin Console. Click into the “Buckets” tab, and let’s create 2 new Buckets: bucket1 and bucket2.

So, now we’ve got our Data Buckets, let’s write some Ruby to create our Client connections to them!
Firstly, make sure you’ve got Libcouchbase installed. Then, make sure you’ve got the latest Couchbase Ruby Gem installed. Then go ahead and create a Ruby file called cb_connect.rb – I am using Ruby 2.0, but you just need to be using 1.9+
require ‘rubygems’
require ‘couchbase’
require ‘couchbase’
CONFIG = {
:node_list => [“localhost:8091”],
:key_prefix => “pool_”,
:pool_size => 3
}
Here, we’re setting some connection config parameters. Our node list is as standard. We are setting a key prefix, to prepend our docs with ‘pool_’ upon setting. We are also setting our pool_size to 3.
Now let’s write a thread-safe pool object, which will proxy all methods to the Couchbase::Bucket instance:
def connection(bucket)
@servers ||= {}
@servers[bucket] ||= begin
size = CONFIG[:pool_size]
params = CONFIG.merge(:bucket => bucket)
Couchbase::ConnectionPool.new(size, params)
end
end
@servers ||= {}
@servers[bucket] ||= begin
size = CONFIG[:pool_size]
params = CONFIG.merge(:bucket => bucket)
Couchbase::ConnectionPool.new(size, params)
end
end
Here you will notice that there is a distinct lack of specificity regarding Buckets. In the config above, we set params to take in the already specified :pool_size, and the :bucket that we specify at ops-time. By writing this small connection method, we are allowing ourselves to specify multiple buckets within our Ruby code.
Let’s test our connection method by writing some ops for Couchbase:
connection(“bucket1”).set(“foo”, “bar”)
connection(“bucket2”).set(“bar”, “foo”)
connection(“bucket2”).set(“bar”, “foo”)
threads = []
5.times do
threads << Thread.new do
connection(“bucket1”).get(“foo”)
connection(“bucket2”).get(“bar”)
end
end
threads.map do |t|
puts [t.object_id, t.value].join(“t“)
end
Here, we’re setting some sample data, but specifying our bucket connection within the Set command. We are then using the built-in threading within Ruby to perform Get operations on our sample objects set. Here, we are also specifying our connection within the Get command.
After writing out this code, you should see some nice data visualization within the Admin UI. The last Block we wrote will join the Keys of the sample data with the value and print them into our Terminal.
In your terminal, run:
ruby cb_connect.rb
You should see the aforementioned visualization and the output:
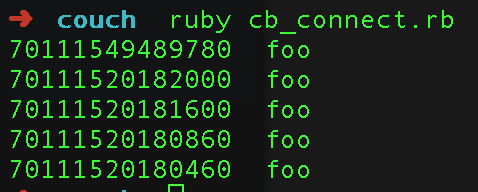
So we’ve setup our connection using the ConnectionPool property within Couchbase (Only available in Ruby 1.9+), and specified our Buckets at ops-time. And that is how we can setup Multiple Bucket Connections through Pooling in the Couchbase Ruby client.
To see the complete code from this blog, see the Gist.
For those of you Rubyists who are partial to using Rails, I am currently writing a sample application on Rails based around a social gamified Leaderboard. I am using the Couchbase-Model gem; which allows for Active_Record–like data modeling. This app and open-source code will be published, alongside another How-To blog, within the next week.
– Robin Johnson
Developer Advocate, Europe
[…] Blog post of the week: Multiple Bucket Connections in Couchbase and Ruby […]
Hello,
If I want to use Couchbase model having multi buckets, what will I do to connect it?
I use couchbase model in Ruby, please guiding me.
Thanks.
currently this library does not support connecting to multiple buckets. Could you describe your use case a bit more?
Hi Sergey Avseyev,
Thanks for your helping
I want to map all attributes of the model to Couchbase, when I read your guide, I don’t know how to push and get a object json for every Bucket on CB.
So can you say me, I want to know more than CB.
Thank Sergey.
Have a good day!
HungCao