It’s unavoidable: If you’re working with a document database, you’re eventually going to need to search for (and through) your JSON documents.
In this tutorial, you’ll add the full-text search capabilities of Couchbase to the basic REST API built with Express that we’ve been building throughout this Node.js series.
The previous post in this series used Express to build a basic API for creating N1QL queries.
Today’s post takes you a step further. You’ll learn how to find JSON documents that contain the text you’re after by adding functionality to your app that uses the Couchbase Search API. Let’s get started.
What Is Full-Text Search?
Full-text search (FTS) is a strange name, but it’s a well-developed concept in academic areas focused on analyzing large pieces of text content. In the database domain we just call it “search” for shorthand, and it’s focused on finding text within JSON documents.
Application developers use search-related tools to find matches without having to write SQL queries which usually require you to know how/where to find the data of interest. In a full-text search scenario you hunt for text with more sophistication.
For example, search systems understand root-words using a concept known as stemming, so you don’t have to look for many permutations of a term manually. Likewise, wildcards, prefixes, and fuzzy matching are possible with robust search systems.
Setting Up Search Indexes
There are two steps to using a Search system: (1) indexing/analyzing the text in each document and (2) requesting a list of documents that contain text-based matches.
The indexing stage is similar to creating secondary indexes for relational/tabular data where you describe the fields or elements to be indexed and the system keeps track of them for you. You can also just tell the system to index every text field in the document, though for large datasets this may not be efficient in production.
The querying stage (a.k.a., the search) sends a piece of text to the server for it to hunt for. The system compares that text to the indexes and returns a list of documents with matches.
Full-text search is straightforward, but there’s an infinite set of options and questions to consider, like:
-
- How to handle phrases and numbers
- Identifying where in a document particular text exists
- Analyzing text across multiple languages
Really, this is a deep-dive topic all of its own. The simple patterns used in this post can be expanded to all different search scenarios as described in this introduction to full-text search.
Preparing Your Couchbase Instance
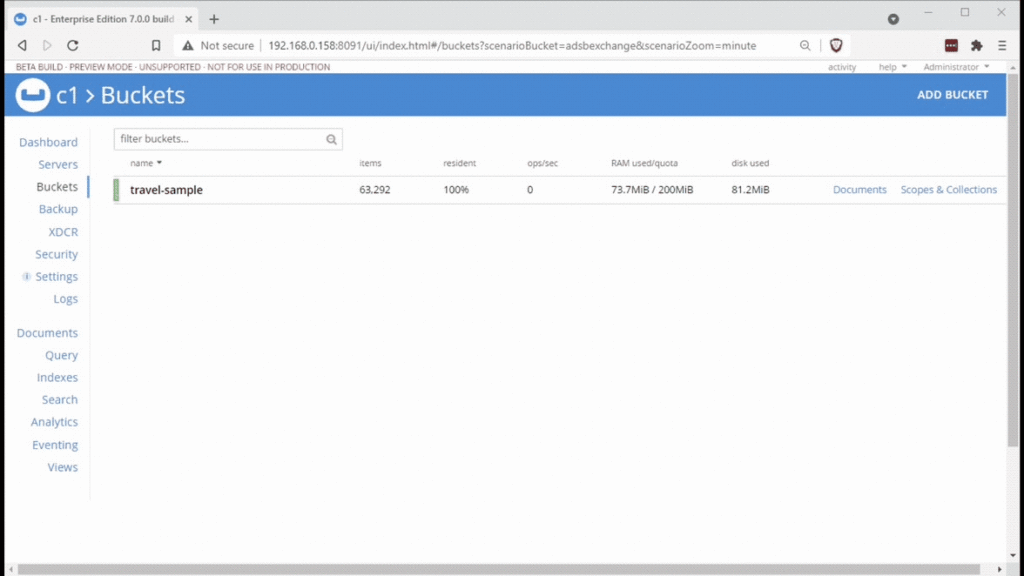
If you are new to this series of JavaScript coding tutorials, you need to install the travel-sample data Bucket, as described in the Couchbase documentation.
The script used in the previous post of this series is also going to be used as a starting point for today’s post. The Node.js code is included at the end of that post.
As you progress through these Node.js tutorials you are building a more complex and useful REST API application. Let’s dive into creating the search index needed to support the next step of your project.
Build a Basic Text Search Index
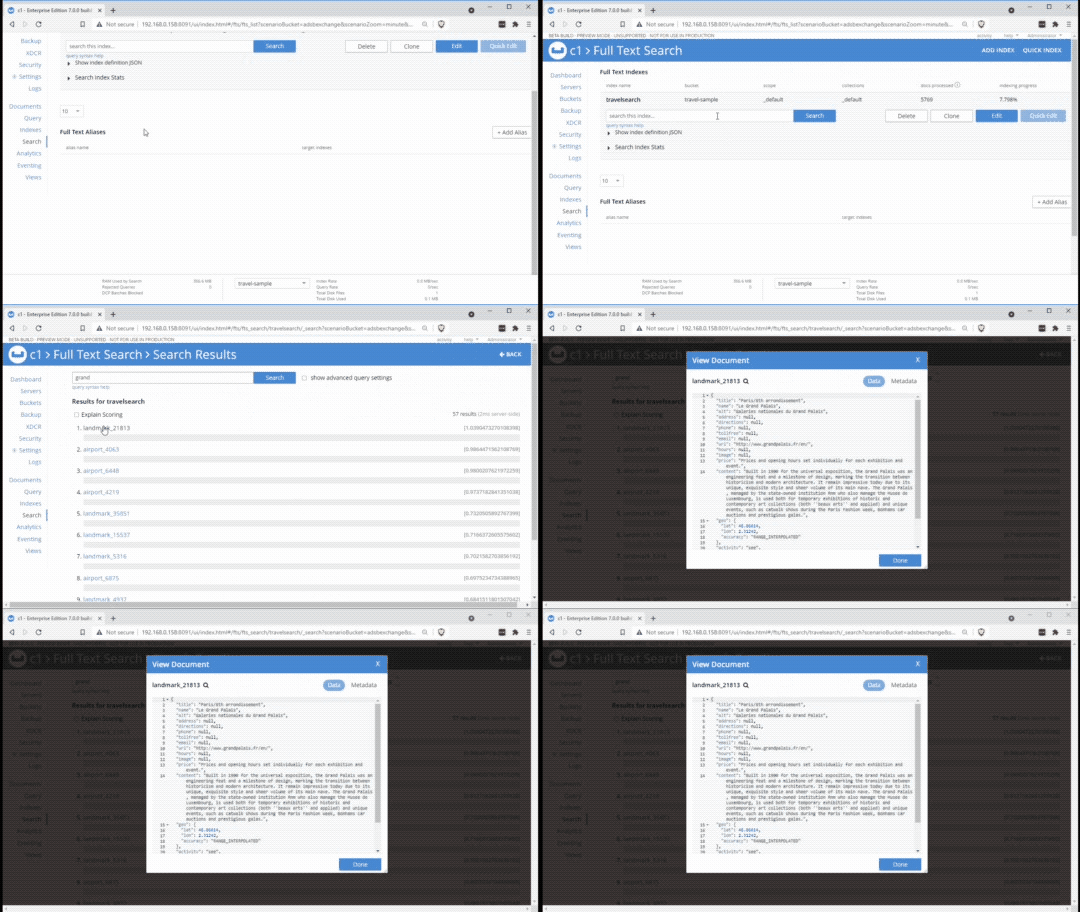
To create a search index, you select the Search tab in the Couchbase Web Console and press the Add Index button.
Then enter the name you want to give the index and choose which Bucket to analyze (travel-sample). Finish by pressing the Create Index button to submit your choices. There are many different options to choose from, but in today’s example, we keep all the defaults for simplicity sake. The following animation shows each of these steps:
After completing these steps, you should see your search indexes and their status in the Web Console. You should also be able to see how many documents were processed.
Indexing on the travel-sample data Bucket takes a few minutes, but once it’s complete, you can do a sample search request through the basic web user interface as shown below.
You enter a simple term in the search box and a list of matching document IDs is returned with the highest-ranking matches at the top. The Web Console makes it easy to click on these IDs to see the full document text.
Creating a Simple Text Search Function
There are many additional options for fine-tuning your searches with boolean operations, fuzzy matching, and more. The Web Console only does a simple query string search and this is the same type you will implement in your code.
To create the new full-text search function you need to:
- Provide a string to search for (e.g., “grand”).
- Specify the search index to use:
travelsearch. - Declare the query type to use:
queryString. - Assemble all the parts together and send to server.
- Receive results and display to user/application.
These five lines of JavaScript code below are an example of setting these variables, bundling them together, passing to the cluster and printing the results to the console:
|
1 2 3 4 5 |
const querystr = "grand"; const searchIndex = 'travelsearch'; const stringQuery = couchbase.SearchQuery.queryString(querystr); const searchResult = cluster.searchQuery(searchIndex, stringQuery); console.log(searchResult); |
If you want to adjust the type of search query, swap out queryString on the third line with another method. Code samples of different types are provided in the Couchbase Full-Text Search documentation.
For example, a date range query looks like this:
const dateQuery = couchbase.SearchQuery.dateRange().start(startDate).end(endDate)
Here below is a full sample standalone script that includes the basic logic. We build it into the Express REST API example in the next section.
|
1 2 3 4 5 6 7 8 9 10 11 12 13 14 15 16 17 18 19 20 21 22 23 24 25 26 |
var couchbase = require("couchbase"); async function main(){ var cluster = new couchbase.Cluster("couchbase://localhost", { username: "Administrator", password: "Administrator" }); var bucket = cluster.bucket("travel-sample"); var collection = bucket.defaultCollection(); const querystr = "grand"; const searchIndex = 'travelsearch'; const stringQuery = couchbase.SearchQuery.queryString(querystr); const searchResult = await cluster.searchQuery(searchIndex, stringQuery); console.log(searchResult); if (searchResult.meta.status.failed == 0) { searchResult.rows.forEach((row)=>{ console.log(row); }); } } main(); |
Taking the Code Further
Continuing our example, you can now add it to the REST API code we built in last week’s tutorial.
Add the code along with the new Express routing so you can send a search request from a URL in the browser. In this case, the path will be: /search/[search term] – e.g., /search/grand.
Here is the route definition for building the full-text search query:
|
1 2 3 4 5 6 7 8 9 10 11 12 13 14 15 16 17 18 19 20 |
app.get('/search/:searchterm', runAsync(async (req, res) => { const querystr = req.params.searchterm; const searchIndex = 'travelsearch'; const stringQuery = couchbase.SearchQuery.queryString(querystr); const searchResult = await cluster.searchQuery( searchIndex, stringQuery, // add options in their own object: { timeout:2000, limit:5} ).catch((e)=>{console.log(e); throw e;}); if (searchResult.meta.status.failed == 0) { res.json(searchResult); searchResult.rows.forEach((row)=>{ console.log(row); }) } })) |
Click below for the full working REST API code, including the document fetch, N1QL query, and search routes:
|
1 2 3 4 5 6 7 8 9 10 11 12 13 14 15 16 17 18 19 20 21 22 23 24 25 26 27 28 29 30 31 32 33 34 35 36 37 38 39 40 41 42 43 44 45 46 47 48 49 50 51 52 53 54 55 56 57 58 59 60 61 62 63 64 65 66 67 68 69 70 71 72 73 74 |
var app = require('express')(); var couchbase = require("couchbase"); async function main() { app.get('/get/:docid', runAsync(async (req, res) => { var docid = req.params.docid; var docjson = await getDoc(docid, function(err, result){ res.json(result.content) }); res.json(docjson.content); })); app.get('/query/:cityname', runAsync(async (req, res) => { var cityname = req.params.cityname; var querystr = `SELECT type, name, city FROM `travel-sample` WHERE city = $CITY;` var params = { parameters: { CITY: cityname}} await cluster.query(querystr, params, function(err, result){ res.json(result) }) })); app.get('/search/:searchterm', runAsync(async (req, res) => { const querystr = req.params.searchterm; const searchIndex = 'travelsearch'; const stringQuery = couchbase.SearchQuery.queryString(querystr); const searchResult = await cluster.searchQuery( searchIndex, stringQuery, // add options in their own object: {timeout:2000, limit:5} ).catch((e)=>{console.log(e); throw e;}); if (searchResult.meta.status.failed == 0) { res.json(searchResult); searchResult.rows.forEach((row)=>{ console.log(row); }) } })) app.listen(3000, () => console.log('Listening on port 3000')); function runAsync (callback) { return function (req, res, next) { callback(req, res, next) .catch(next) } } var cluster = new couchbase.Cluster("couchbase://localhost", { username: "Administrator", password: "Administrator" }); var bucket = cluster.bucket("travel-sample"); var collection = bucket.defaultCollection(); var getDoc = async (key) => { var result = await collection.get(key); console.log(result) return result } } main(); |
Running the Search Query REST API
Access the application through the web browser on port 3000 and with the search path: http://localhost:3000/search/grand.
The results of the search are shown here and include a list of matching document IDs and the ranking score of the match:
|
1 2 3 4 5 6 7 8 9 10 |
{"rows":[{"index":"travelsearch_1bf0c4c01d25b582_4c1c5584","id":"landmark_21813","score":1.063667683545401,"sort":["_score"]}, {"index":"travelsearch_1bf0c4c01d25b582_4c1c5584","id":"airport_7057","score":1.016530994468649,"sort":["_score"]}, {"index":"travelsearch_1bf0c4c01d25b582_4c1c5584","id":"airport_4063","score":1.0098211451111556,"sort":["_score"]}, {"index":"travelsearch_1bf0c4c01d25b582_4c1c5584","id":"airport_3442","score":1.0098211451111556,"sort":["_score"]}, {"index":"travelsearch_1bf0c4c01d25b582_4c1c5584","id":"airport_6448","score":1.0032424768865669,"sort":["_score"]}], "meta":{"status":{"total":1,"failed":0,"successful":1},"request":{"query":{"query":"grand"},"size":5,"from":0,"highlight":null, "fields":null,"facets":null,"explain":false, "sort":["-_score"],"includeLocations":false, "search_after":null,"search_before":null}, "hits":[],"total_hits":169,"max_score":1.063667683545401,"took":208427,"facets":null}} |
Note that the search results also include some useful metadata that shows the total number of hits/matches, execution time and more.
Conclusion
The opportunities for using Couchbase in search-based applications are endless.
With all the different types of queries and other search options available, there’s still a lot more to learn. Here are a few launching points for you to consider:
-
- Read the docs and substitute for another type of search query.
- Complete the Node.js & Couchbase certification course.
- Take the free online Architect certification course which covers full-text search and more
That’s a wrap for this series on developing with Node.js and Couchbase. Good luck on your continued journey with JavaScript!
Catch up with the rest of the Node.js + Couchbase how-to series:
-
- How to Get Started with the Node.js SDK for Couchbase
- How to Create Async Get/Upsert Calls with Node.js and Couchbase
- Build a REST-Based Application with Node.js, Express and Couchbase
- How to Query JSON Data Using N1QL for Node.js and Couchbase
- How to Add Full-Text Search Functionality to Your JavaScript App


