
What is the Enterprise Pivotal Container Service (PKS)?
Enterprise Pivotal Container Service (PKS) uses the latest stable OSS distribution of Kubernetes—with no proprietary extensions. With Enterprise PKS, you can deploy, scale, patch, and upgrade all the Kubernetes clusters in your system—without downtime. Rapidly apply security fixes when new vulnerabilities are detected.
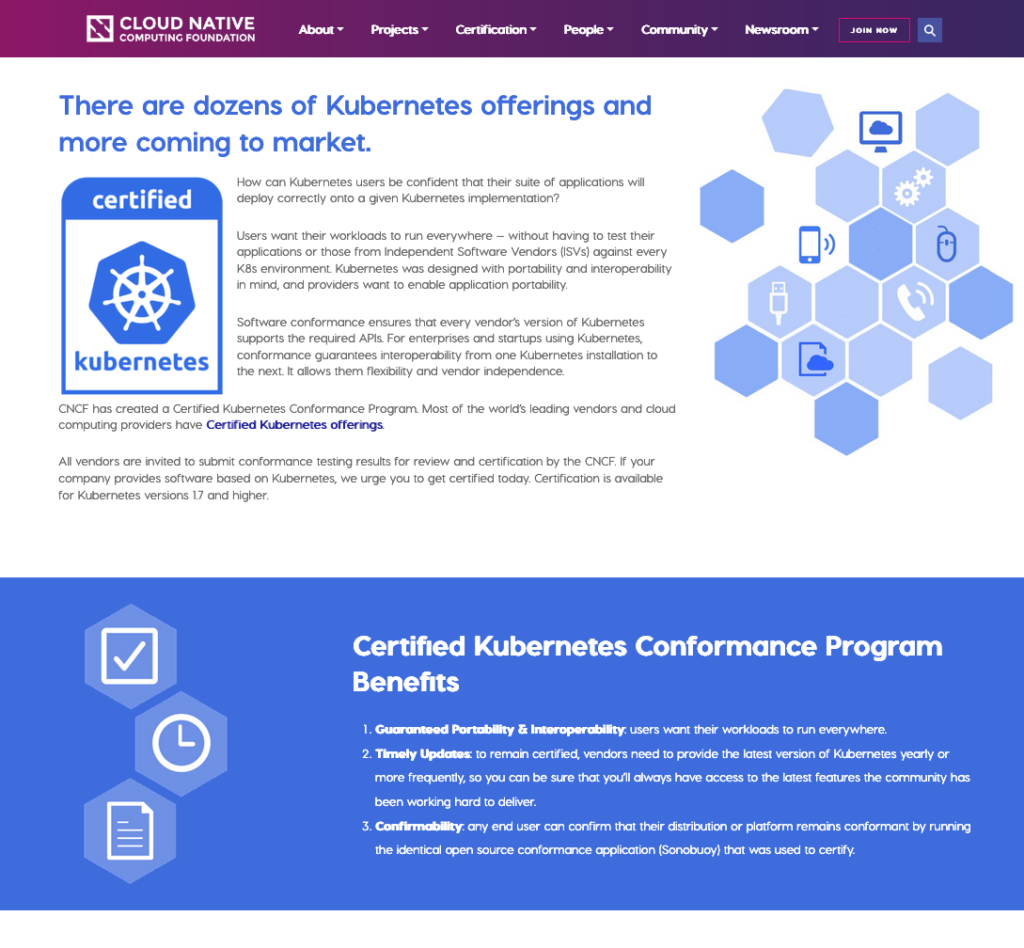
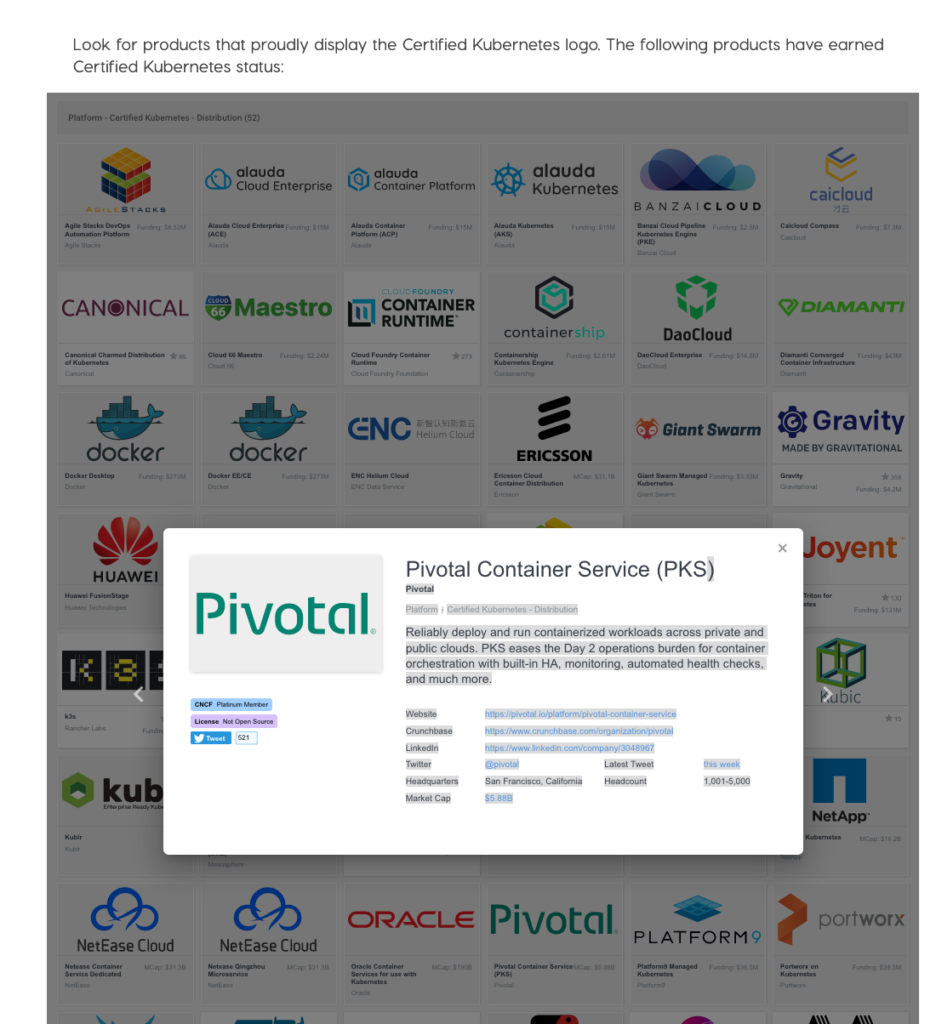
Enterprise PKS is one of the Certified Kubernetes Hosted Platforms under CNCF Certified Kubernetes Offerings.
This blog will explain how to get started with deploying and running Couchbase Autonomous Operator on Enterprise PKS using Persistent Storage.
Deploying Couchbase Autonomous Operator on Enterprise PKS
Using Kubernetes Persistent Volumes
Kubernetes persistent volumes offer a way to create Couchbase pods with data that resides outside of the actual pods themselves. This decoupling provides a higher degree of resilience for data within the Couchbase cluster when a node goes down or if its associated pod gets terminated. Likewise, persistent volumes can provide greater flexibility and efficiency in deployments because Kubernetes can automatically move Couchbase pods between nodes without worrying about any downtime or data loss. The Couchbase Autonomous Operator supports some of the most popular Kubernetes persistent volumes, such as GlusterFS, CephRBD, AWS, Azure Disk, GCE, and Portworx.
Prerequisites
- You need to get the Pivotal account to get access to Pivotal products – Pivotal Web Services, Pivotal Network, Partner Portal and Pivotal Support
- Download the Couchbase Autonomous Operator 1.1 package for your platform
Creating a Kubernetes cluster on Pivotal Container Service (PKS)
You can install Pivotal Container Service (PKS) on Amazon Web Services (AWS), Google Cloud Platform (GCP), or vSphere. For installation instructions, see the documentation Installing PKS.
Thanks for the help from Jamie O’Meara from Pivotal Software I was able to get the latest preview version of PKS 1.4 deployed on Google Cloud Platform (GCP).
To get started with Pivotal Container Service (PKS) you first need to install PKS CLI to get access to PKS cluster.
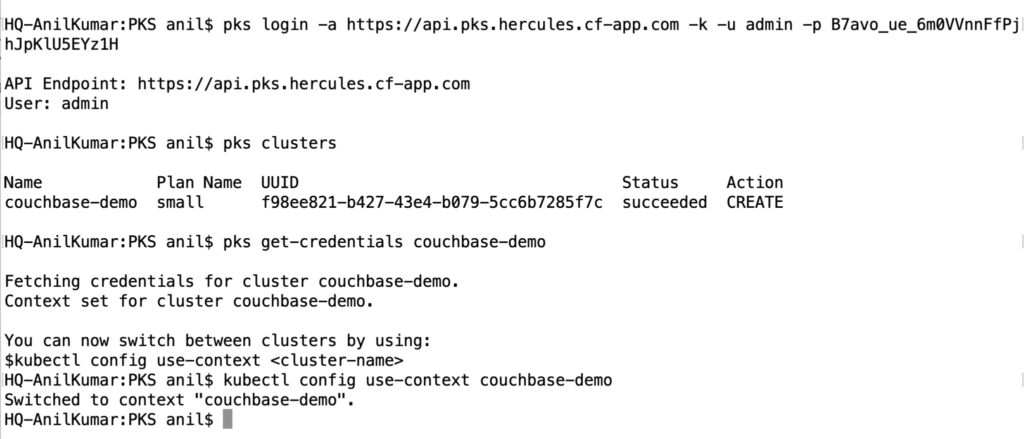
1. Login to PKS cluster you have deployed using the PKS CLI. Once you login you can use the PKS CLI to request a Kubeconfig access credential.
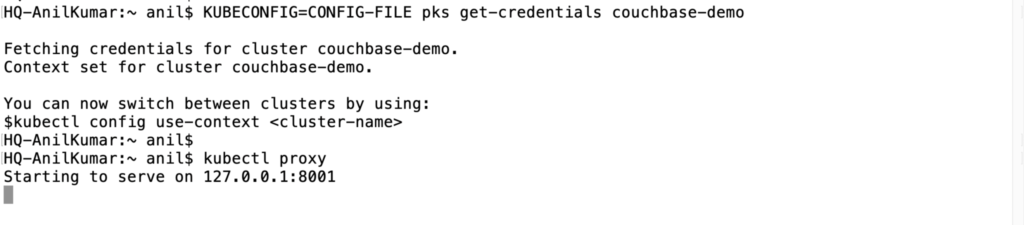
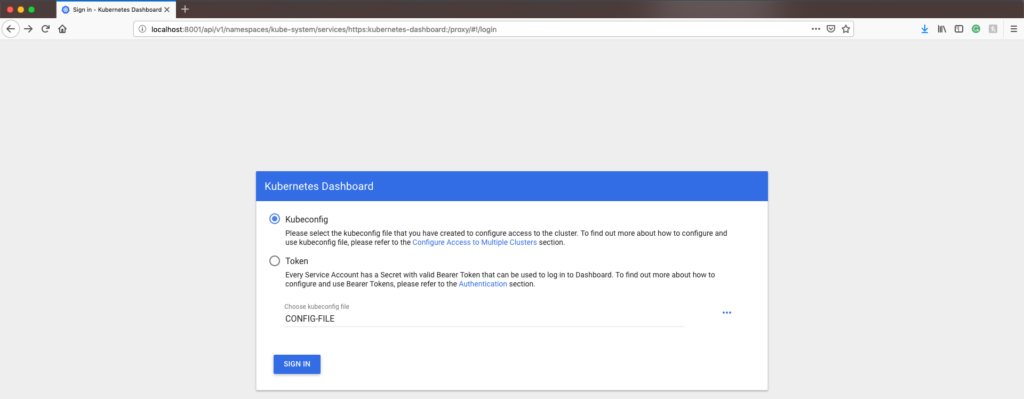
2. To get access to PKS Dashboard you have to save the Kubernetes configuration file and start the proxy server.
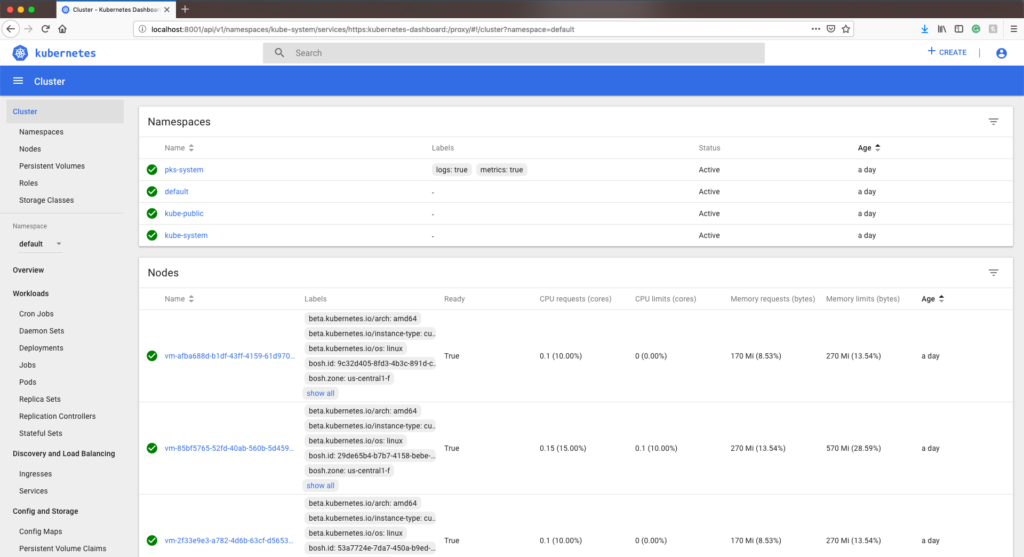
3. Now you have fully deployed PKS cluster on GCP.
Installing the Couchbase Autonomous Operator
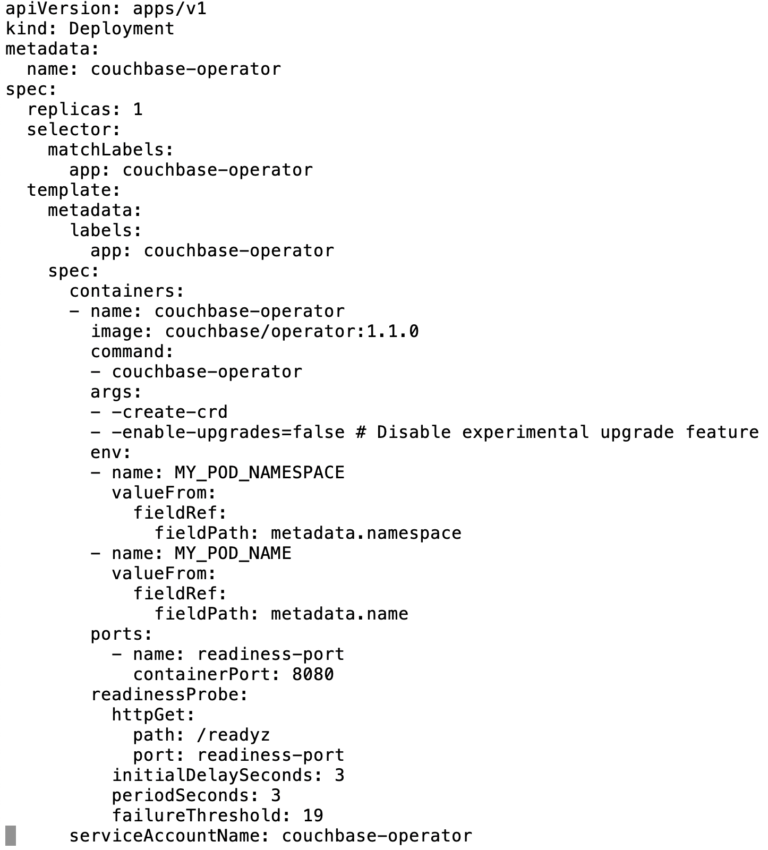
1. Before creating the Couchbase cluster, you need to first install Couchbase Autonomous Operator on the Kubernetes cluster. For detailed instructions on how to install and prerequisites read Couchbase Autonomous Operator 1.1 documentation. The Couchbase Autonomous Operator configuration is defined below.
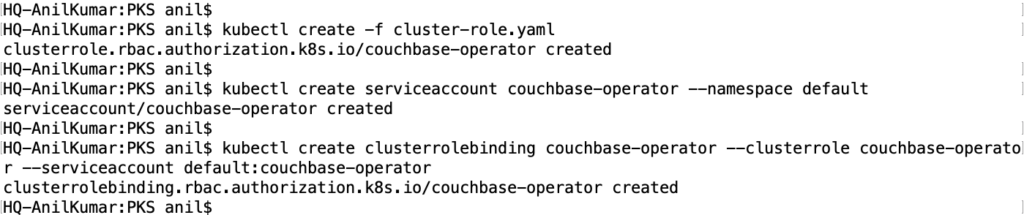
2. Now run the below commands to ‘Create a Cluster Role’ and ‘Create a Service Account’.
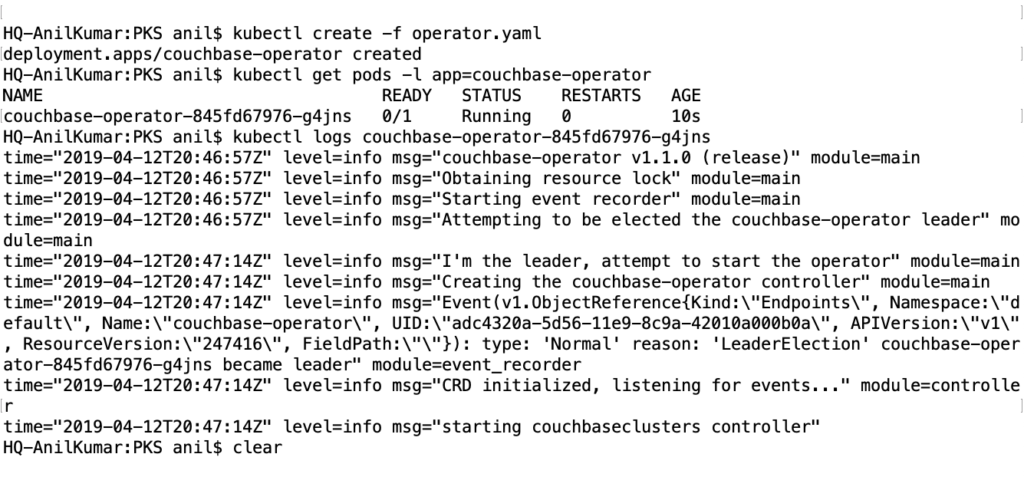
3. You are ready to deploy the Couchbase Autonomous Operator. Shortly, after you run the ‘kubectl create -f Operator.yaml’ the Couchbase Autonomous Operator will be up and running you can check the logs to confirm.
Creating the Couchbase cluster with Persistent Storage
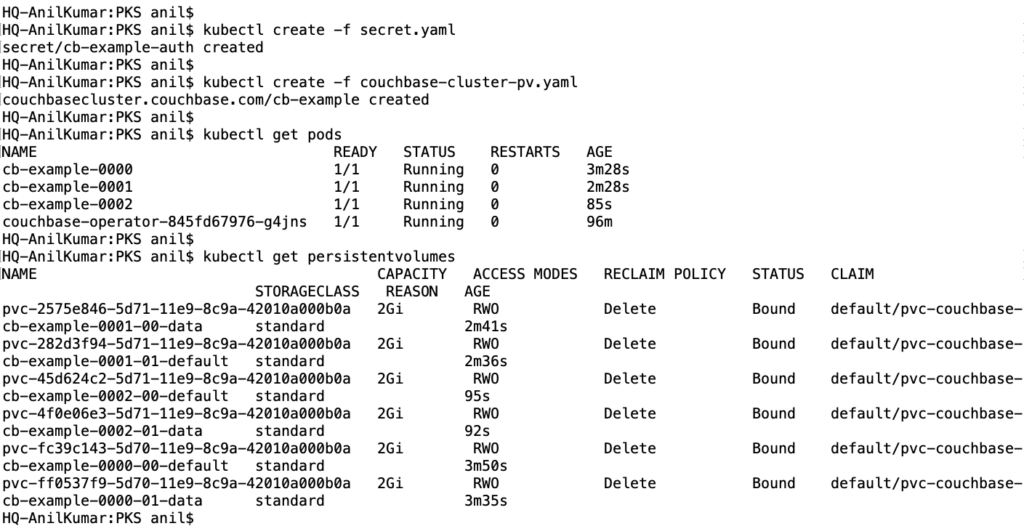
1. Before creating the Couchbase cluster, we need to create a secret with the secret.yaml file which included in the downloaded package.

2. Before deploying Couchbase cluster read the documentation on Setting up Persistent Volumes to make sure you have the correct storage class.
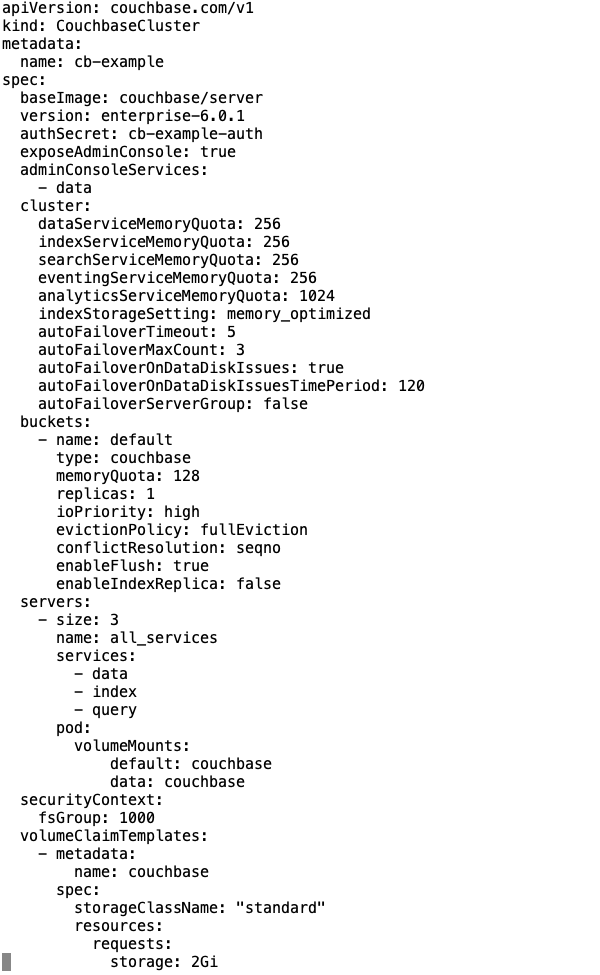
3. To deploy a Couchbase Server cluster using the Operator, you need to define the CouchbaseCluster configuration file that describes what you want the cluster to look like (e.g. couchbase-version, number of nodes, types of services, storage-class, etc).
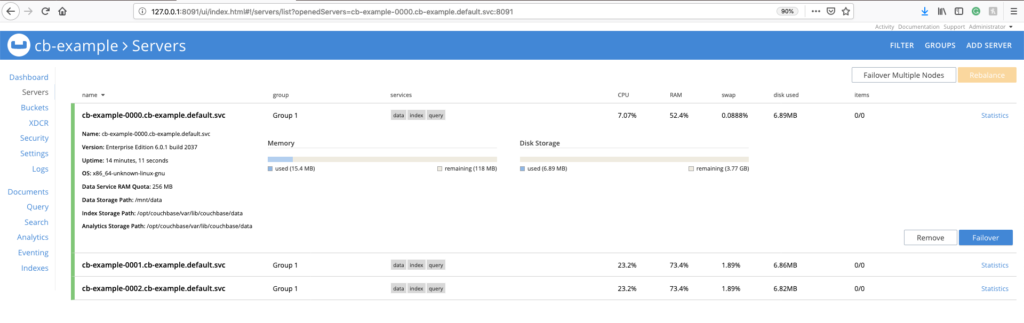
3. Now, let’s deploy Couchbase Data Platform on PKS cluster.
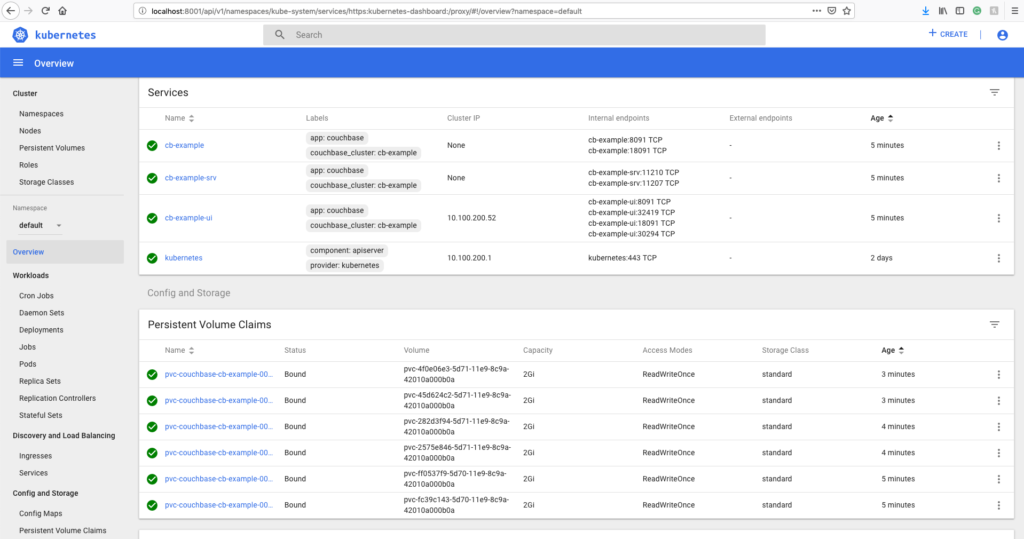
4. You can see the deployment, pods, storage, and logs through Kubernetes Dashboard web console.
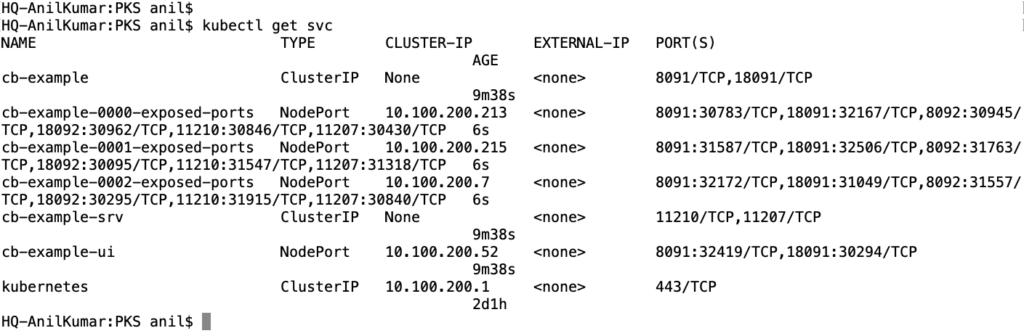
5. The port details for accessing the Couchbase Web Console can be found in the cb-example-ui service found under Services in the left-hand nav. You’ll see a set of Couchbase ports and their corresponding Node Ports. In this example, the Couchbase ports are 8091 (non-SSL) and 18091 (SSL). You can access the Couchbase Web Console on the Node Ports, which in this example are 30306 (non-SSL) and 32347 (SSL). Therefore you would point your browser to <node_ip>:30306, where <node_ip> is the IP address of any Kubernetes worker node that hosts the Couchbase cluster.
6. You can now connect to the Couchbase cluster using the credentials saved in the secret. Other application pods can mount and use this secret and communicate with the service.
Auto Recovery with Persistent Volumes
Now that Couchbase cluster is deployed and running on Kubernetes cluster lets run one ‘auto recovery’ scenario. The Couchbase Autonomous Operator is designed to always monitor the Couchbase cluster for failures. When a node or server group failure is detected, the Couchbase Operator is designed to automatically creates a new instance either on the same host machine (preferably) or on a different host machine. It will then rebalance out the bad instances, add the new instance, and bring the cluster back up to full capacity.
If a Couchbase cluster is configured with persistent volumes, the Couchbase Autonomous Operator does the following during an auto recovery event:
- Creates a new instance and attaches it to the same persistent volume
- Performs complex Couchbase operations such as delta-node recovery and warm-up operations, which reduces rebalancing data from all other instances (a time-consuming operation depending on the size of data)
- Removes the faulty instance from the Couchbase cluster and replaces it with a new instance, ensuring that the cluster is back up to the desired configuration without any loss of data
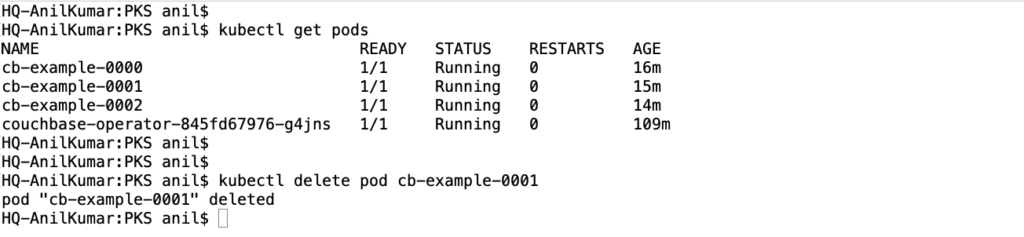
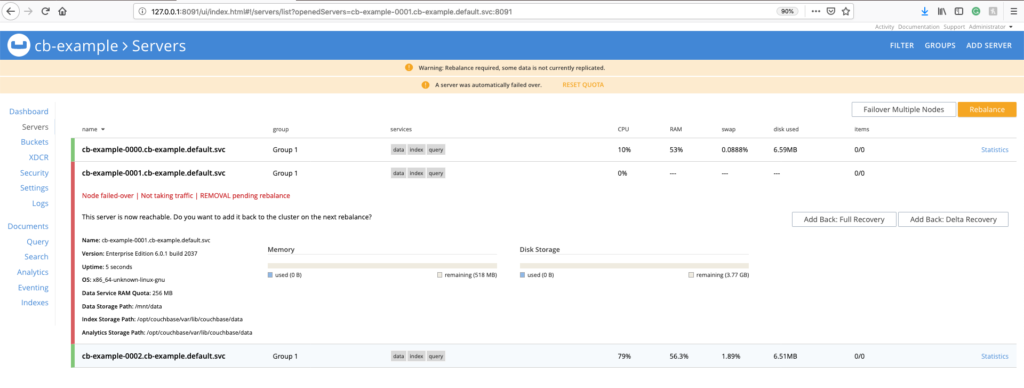
To illustrate the points above, let’s delete the pod cb-example-0001 to see how the cluster behaves.
Couchbase cluster detects one of the pods down and initiates auto-failover.
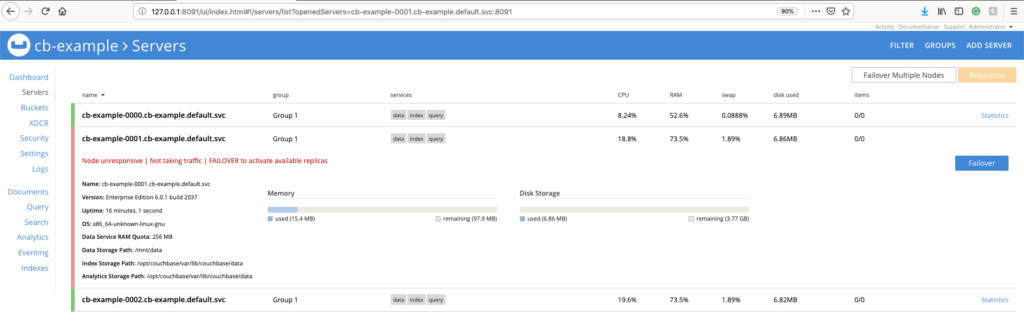
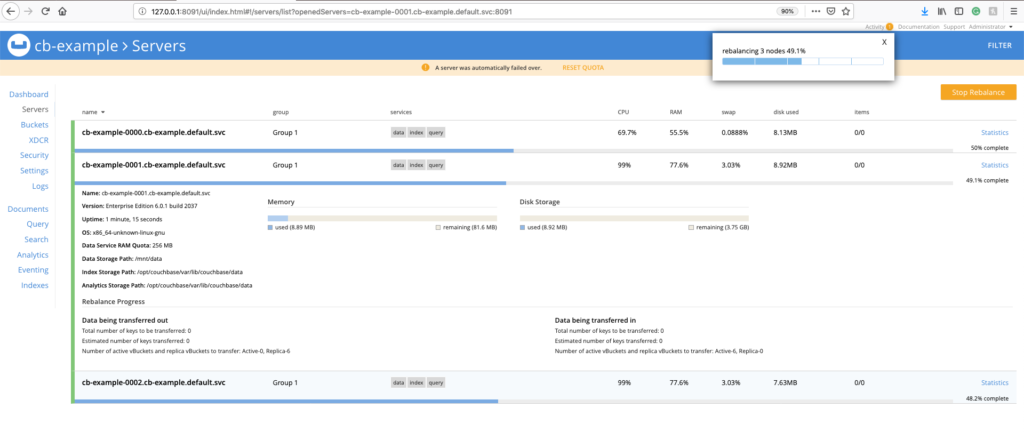
New pods gets created instantaneously and attaches it to the same persistent volume.
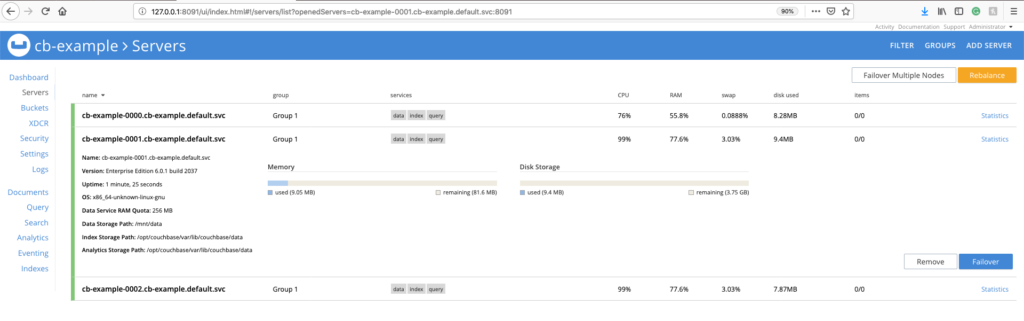
Couchbase cluster is self-healed and back to normal.
Hope that this blog has given you a good overall guide for getting started with the Couchbase Autonomous Operator on Pivotal Container Service (PKS). Just to recap on what is needed to get started with Couchbase Autonomous Operator on PKS …
- Create an Pivotal account to get access to Pivotal products
- Deploy PKS cluster on any of the supported cloud
- Create a Kubernetes cluster
- Install Couchbase Autonomous Operator
- Create a Couchbase cluster with Persistent Storage