
This post looks at how you can get started with Couchbase Lite in your iOS App. Couchbase Lite is an embedded JSON database that can work standalone, in a P2P network, or with a Sync Gateway as a remote endpoint. While we will be looking at the framework in the context of an iOS App in Swift, everything that’s discussed here applies equally to mobile apps developed in any other platform (Android, iOS (ObjC), Xamarin). Deviations will be specified as such. Stay tuned for related posts for the other platforms!
NOTE: We will be discussing Couchbase Mobile v1.4 which is the current production release. There is a newer Developer Preview version 2.0 of Couchbase Mobile . We will dive into that in a future post.
Background
The Couchbase Mobile Stack comprises the Couchbase Server, Couchbase Sync Gateway and Couchbase Lite embedded Database. You can learn more about the server in the Getting started with Couchbase Server guide and the Sync Gateway in the Getting Started with Couchbase Sync Gateway guide.
I’ll assume you’re familiar with developing iOS Apps and basics of Swift. If you want to read up on NoSQL databases or Couchbase, you can find lots of resources on the Couchbase site.
Couchbase is open-source. Everything I’ll use here is free to try out.
Couchbase Lite
Couchbase Lite can be used in several deployment modes.
- Option 1: It can be used as a standalone cross-platform embedded database on a device
- Option 2: It can be used in conjunction with a remote Sync Gateway that would allow it to sync data across devices. This case can be extended to include the full Couchbase stack with the Couchbase Server. From the perspective of Couchbase Lite on the device, it should not really matter if there is a Couchbase Server or not since Couchbase Lite will interface with the remote Sync Gateway.
- Option 3: It can be used in a P2P mode
We will focus on Option 1 here.
Native API
Couchbase Lite exposes a native API for iOS, Android and Windows that allows the Apps to easily interface with the Couchbase platform. As an App Developer, you do not have to worry about the internals of the Couchbase Lite embedded database, but you can instead focus on building your awesome app . The native API allows you to interact with the Couchbase Lite framework just as you would interact with other platform frameworks/ subsystems. Again, we will be discussing Couchbase Mobile v1.4 in this blog post. You can get a full listing of the APIs on our Couchbase Developer site.
Integration
There are many options to integrate Couchbase Lite framework into your iOS App. It is probably the simplest to use Dependency Management Systems like Cocoapods or Carthage, but if you prefer, there is the option to manually include the framework into your app project . Check out our Couchbase Mobile Getting Started Guide for the various integration options.
Note that in case of a Swift app, after importing the framework, you will have to create a Bridging Header (if your app doesn’t already have one) and import the following files
|
1 2 |
#import <CouchbaseLite/CouchbaseLite.h> #import <CouchbaseLiteListener/CBLListener.h> |
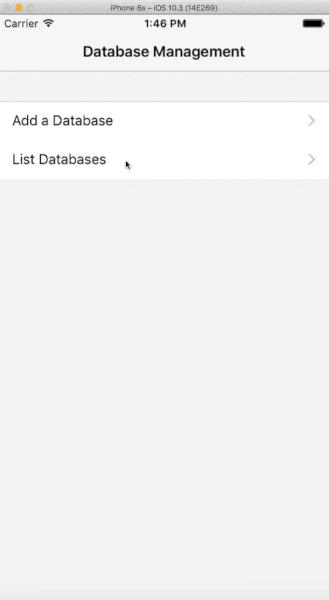
Demo App
Please download the Demo Xcode project from this Github repo . We will use this app as an example in the rest of the blog.
|
1 |
git clone git@github.com:couchbaselabs/couchbase-lite-ios-starterapp.git |
This app uses Cocoapods to integrate the Couchbase Lite framework and is intended to familiarize you with the basics of using Couchbase Lite framework. Once downloaded, build and run the App. Play around with the app.You can use this app as a starting point and extend it to test the other APIs.
Basic Workflow
Creating a Local Database
Open the DBMainMenuViewController.swift file and locate the createDBWithName function.
This will create a database with specified name in the default path (/Library/Application Support). You can specify a different directory when you instantiate the CBLManager class.
|
1 2 3 4 5 6 7 8 9 10 11 12 |
do { // 1: Set Database Options let options = CBLDatabaseOptions() options.storageType = kCBLSQLiteStorage options.create = true // 2: Create a DB if it does not exist else return handle to existing one try cbManager.openDatabaseNamed(name.lowercased(), with: options) } catch { // handle error } |
- Create CBLDatabaseOptions object to associate with the database. For instance, you can set the encryption key to use with your database using the encryptionKey property. Explore the other options on CBLDatabaseOptions class.
- Database Names must to be lowercase. The sample app will automatically lowercase the names . If successful, a new local database will be created if it does not exist. If it exists, a handle to existing database will be returned.
Listing the Databases
This is very straightforward. Open the DBListTableViewController.swift file. The allDatabaseNames property on CBLManager lists the databases that were created.
Adding a New Document to a Database
Open the DocListTableViewController.swift file and locate the createDocWithName function.
|
1 2 3 4 5 6 7 8 9 10 11 12 13 |
do { // 1: Create Document with unique Id let doc = self.db?.createDocument() // 2: Construct user properties Object let userProps = [DocumentUserProperties.name.rawValue:name,DocumentUserProperties.overview.rawValue:overview] // 3: Add a new revision with specified user properties let _ = try doc?.putProperties(userProps) } catch { // handle error } |
- As a result of this call, a Document is created with a unique Id
- You can specify a set of user properties as <key:value> pairs. There is an alternative in which you can use CBLDocumentModel object to specify your application data. The CBLDocumentModel is only available for the iOS platform. We will use <key:value> properties in our example
This creates new revision of the document with the specified user properties
Listing Documents in Database
Open the DocListTableViewController.swift file and locate the getAllDocumentForDatabase function
|
1 2 3 4 5 6 7 8 9 10 11 12 13 14 15 16 17 18 19 20 21 22 23 24 25 26 27 28 29 30 31 32 33 34 35 36 37 38 39 |
do { guard let dbName = dbName else { return } // 1. Get handle to DB with specified name self.db = try cbManager.existingDatabaseNamed(dbName) // 2. Create Query to fetch all documents. You can set a number of properties // on the query object liveQuery = self.db?.createAllDocumentsQuery().asLive() guard let liveQuery = liveQuery else { return } // 3: You can optionally set a number of properties on the query object. // Explore other properties on the query object liveQuery.limit = UInt(UINT32_MAX) // All documents // query.postFilter = //4. Start observing for changes to the database self.addLiveQueryObserverAndStartObserving() // 5: Run the query to fetch documents asynchronously liveQuery.runAsync({ (enumerator, error) in switch error { case nil: // 6: The "enumerator" is of type CBLQueryEnumerator and // is an enumerator for the results self.docsEnumerator = enumerator default: } }) } catch { // handle error } |
- Get handle to database with specified name
- Create a CBLQuery object. This Query is used to fetch all documents. You can create a regular query object or a “live” query object. The “live” query object is of type CBLLiveQuery that automatically refreshes everytime the database changes in a way that affects the query results
- The query object has a number of properties that can be tweaked in order to customize the results. Try modifying the properties and seeing the effect on results
- You will have to explicitly add an observer to the Live Query object be notified of changes to the database. We will discuss this more on section on “Observing Changes to Documents In Database”. Don’t forget to remove the observer and stop observing changes when you no longer need it!
- Execute the query asynchronously. You can also do it synchronously if you prefer , but its probably recommended to do it async if the data sets are large.
- Once the query executes successfully, you get a CBLQueryEnumerator object. The query enumerator allows you to enumerate the results. It lends itself very well as a data source for the Table View that displays the results
Editing an Existing Document
Open the DocListTableViewController.swift file and locate the updateDocWithName function.
|
1 2 3 4 5 6 7 8 9 10 11 12 13 14 15 16 17 18 19 20 21 22 23 24 25 26 27 28 |
do { // 1: Get the document associated with the row let doc = self.docAtIndex(index) // 2: Construct user properties Object with updated values var userProps = [DocumentUserProperties.name.rawValue:name,DocumentUserProperties.overview.rawValue:overview] // 3: If a previous revision of document exists, make sure to specify that. // SInce its an update, it should exist! if let revId = doc?.currentRevisionID { userProps["_rev"] = revId } // 4: Add a new revision with specified user properties let savedRev = try doc?.putProperties(userProps) } catch { // handle error } fileprivate func docAtIndex(_ index:Int) -> CBLDocument? { // 1. Get the CBLQueryRow object at specified index let queryRow = self.docsEnumerator?.row(at: UInt(index)) // 2: Get the document associated with the row let doc = queryRow?.document return doc } |
- Get handle to document that needs to be edited. The CBLQueryEnumerator can be can be queried to fetch handle to the document at selected Index
- Update the user properties as <key:value> pairs. There is an alternative in which you can use CBLDocumentModel object to specify your application data. This is only available on iOS. We will use <key:value> properties in our example.
- Updates to the document will require a revisionId to explicitly indicate the revision of the document that needs to be updated. This is specified using “_rev” key. This is required for conflict resolution. You can find more details here. This creates a new revision of the document with the specified user properties
Deleting an Existing Document
Open the DocListTableViewController.swift file and locate the deleteDocAtIndex function.
|
1 2 3 4 5 6 7 8 9 10 |
do { // 1: Get the document associated with the row let doc = self.docAtIndex(index) // 2: Delete the document try doc?.delete() } catch { // Handle error } |
- Get handle to document that needs to be edited. The CBLQueryEnumerator can be can be queried to fetch handle to the document at selected Index
- Delete the document. This deletes all revisions of document
Observing Changes to Documents in Database
Open the DocListTableViewController.swift file and locate the addLiveQueryObserverAndStartObserving function
|
1 2 3 4 5 |
// 1. iOS Specific. Add observer to the live Query object liveQuery.addObserver(self, forKeyPath: "rows", options: NSKeyValueObservingOptions.new, context: nil) // 2. Start observing changes liveQuery.start() |
- In order to be notified of changes to the database that affect the Query results, add an observer to the Live Query object . This is a case where the Swift/ Obj C versions differ from other mobile platforms. If you are developing on other platforms, you can call the addChangeListener API on the Live Query object. However, in Couchbase Lite 1.4, this API is unsupported on the iOS platforms and we will instead leverage iOS’s Key-Value-Observer pattern to be notified of changes. Add a KVO observer to the Live Query object to start observing changes to the “rows” property on Live Query object
- Start observing changes
Whenever there is a change to the database that affects the “rows” property of the LiveQuery object, your app will be notified of changes. When you receive the notification of change, you can update your UI, which in this case would be reloading the tableview.
|
1 2 3 4 5 6 |
override func observeValue(forKeyPath keyPath: String?, of object: Any?, change: [NSKeyValueChangeKey : Any]?, context: UnsafeMutableRawPointer?) { if keyPath == "rows" { self.docsEnumerator = self.liveQuery?.rows tableView.reloadData() } } |
Deleting a Database
Open the DBListTableViewController.swift file and locate the deleteDatabaseAtIndex function.
|
1 2 3 4 5 6 7 8 9 10 11 12 13 14 15 16 |
do { // 1. Get handle to database if exists let db = try cbManager.existingDatabaseNamed(dbToDelete) // 2. Delete the database try db.delete() // 3. update local bookkeeping self.dbNames?.remove(at: indexPath.row) // 4. Update UI tableView.deleteRows(at: [indexPath], with: .automatic) } catch { // handle error } |
Deletion of a database is handled through a simple delete() call on the database.
Conclusion
As you can see, it is pretty straightforward to integrate a standalone version of Couchbase Lite into your new or existing iOS App. You can download the sample app discussed in this post from Github repo and try exploring the various interfaces. If you have further questions, feel free to reach out to me at Twitter @rajagp or email me priya.rajagopal@couchbase.com.
The Couchbase Mobile Dev Forums is another great place to get your mobile related questions answered . Also, checkout out the Couchbase Developer Portal for more on Couchbase Mobile.
[…] of Couchbase Server, Sync Gateway and Couchbase Lite embedded NoSQL Database. In an earlier post, we discussed how Couchbase Lite can be used as a standalone embedded NoSQL database in iOS apps. […]
[…] mode. In this post, we will not go over the details of integrating with Couchbase Lite. The Getting Started With Couchbase Lite blog is a good place to get started on […]