
Technological advances have made building applications that help drive business easier than ever before. App development no longer lies solely in the hands of engineering teams but can be supplemented by citizen developers and business users. And as more of these platforms become cloud-native, business app design, development, and deployment all occur in the cloud. With applications shifting to the cloud, it only makes sense that back-end data would also migrate to the cloud. While many low- to no-code solutions offer bespoke connectivity for relational databases, many do not offer connectivity to powerful, NoSQL solutions like Couchbase.
Low-code/no-code app development using Couchbase Capella and CData Connect Cloud
Couchbase Capella takes all the benefits of Couchbase’s NoSQL storage solution and makes it cloud-native – accessible from anywhere. When paired with CData Connect Cloud, you get instant, cloud-to-cloud access to Couchbase Capella data from cloud-based low-code platforms, like Microsoft Power Apps.
Microsoft Power Apps is a service for building and using custom business apps that connect to your data and work across the web and mobile – without the time and expense of custom software development. When you join Couchbase Capella with Power Apps through CData Connect Cloud, you build cloud-based, low-code business apps on top of cloud-based NoSQL data.
This article discusses connecting to Couchbase Capella in CData Connect Cloud and building a simple app in Power Apps based on the Couchbase data.
Configure Couchbase Capella for use with CData Connect Cloud
There are some configuration steps you need to make in Couchbase Capella and notes to make to connect to Couchbase Capella from CData Connect Cloud. Start by signing into your Couchbase Capella account, selecting the cluster you wish to connect to, and navigating to the “Connect” tab.
-
- Make note URL in the Wide Area Network section (this is the address of your Couchbase Capella Server).
- In the Wide Area Network section, click Manage Allowed IP and add the appropriate IP addresses (the list of IP Addresses is available from the CData Support Team).
- In the Database Credentials, click Manage Credentials to create a database user with the appropriate permissions (this is the username and password you will use to connect to Couchbase Capella).
Connect to Couchbase Capella in CData Connect Cloud
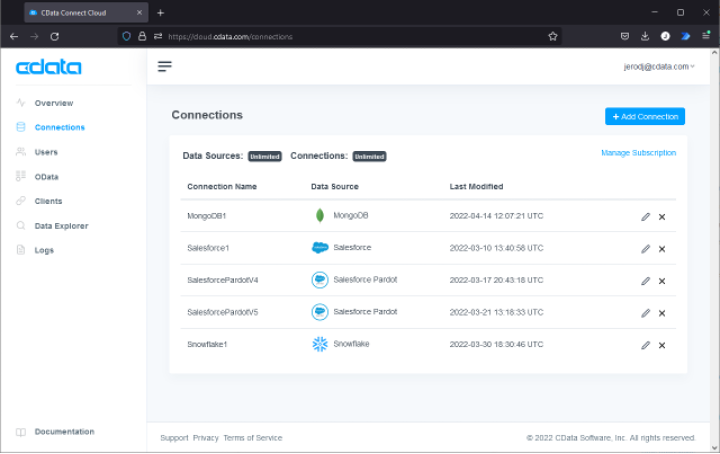
CData Connect Cloud uses a straightforward, point-and-click interface to connect to data sources.
-
- Start by logging into CData Connect Cloud (free trial), navigating to the Connections page and clicking Add Connection.
-
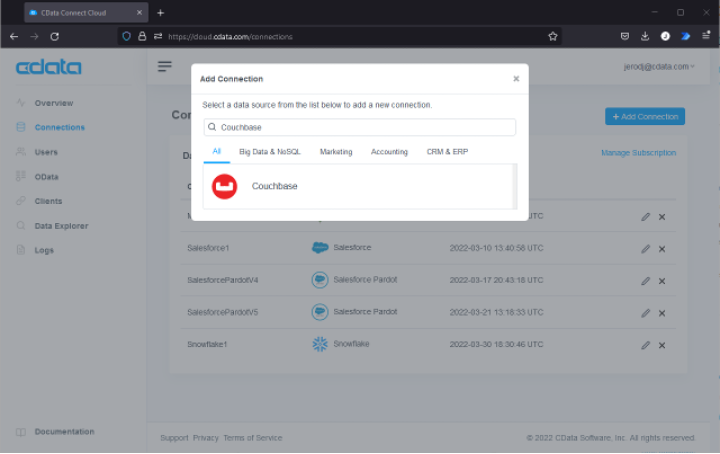
- Search for Couchbase and click to add a new Couchbase connection.
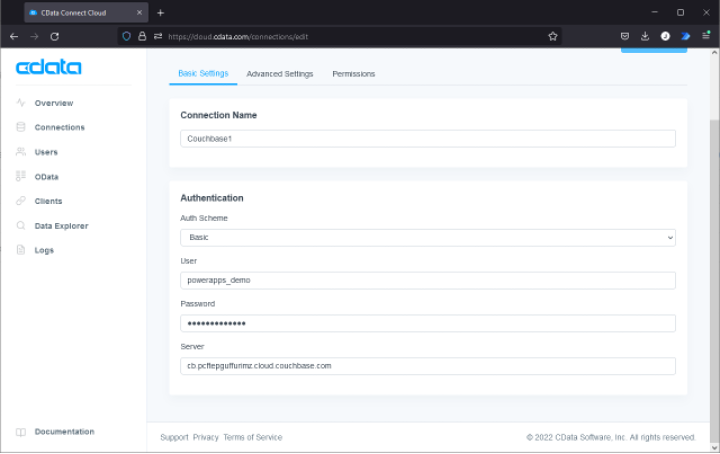
- Configure the Couchbase connection by setting each of these:
- Search for Couchbase and click to add a new Couchbase connection.
-
-
- Auth Scheme to Basic
- User to the username for your database credentials (see above)
- Password to the password for your database credentials (see above)
- Server to the URL for your Couchbase Capella Server (see above)
-
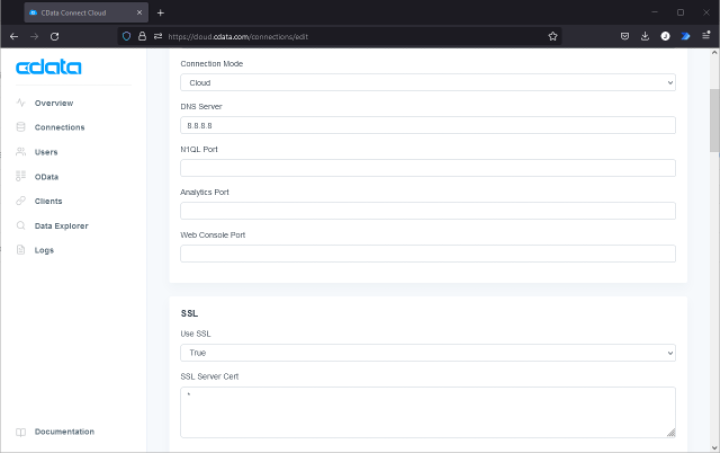
On the Advanced Settings tab, set:
-
-
- Connection Mode to Cloud
- DNS Server to a public DNS Server like 8.8.8.8 or 1.1.1.1
- Use SSL to True
- SSL Server Cert to * (this accepts the Server Certificate from Couchbase Capella)
-
-
- Navigate to the Permissions in the Add Couchbase Connection page and update the User-based permissions as needed.
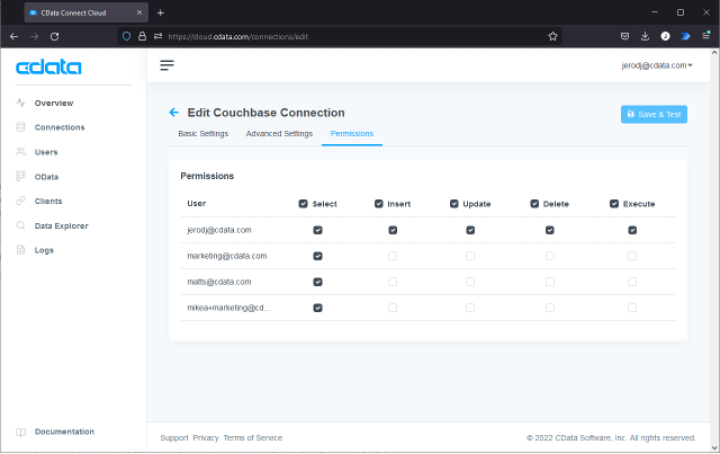
- Navigate to the Permissions in the Add Couchbase Connection page and update the User-based permissions as needed.
-
- Click on your username in the Connect Cloud interface and click Settings. Navigate to the Access Tokens tab and (if you have not already) create a Personal Access Token (PAT) for connecting to CData Connect Cloud from PowerApps.
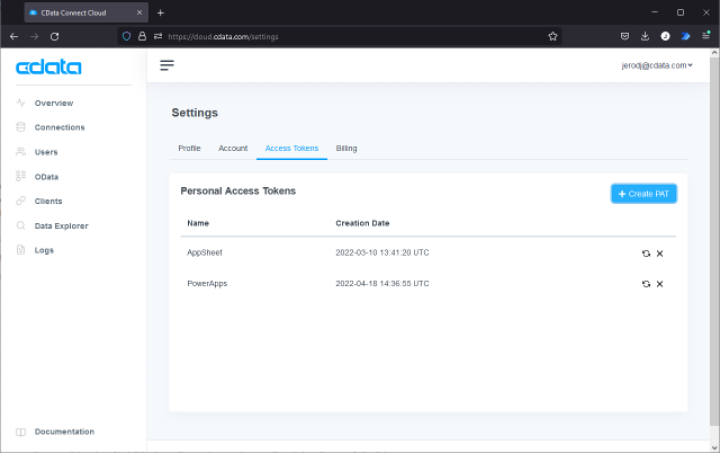
- Click on your username in the Connect Cloud interface and click Settings. Navigate to the Access Tokens tab and (if you have not already) create a Personal Access Token (PAT) for connecting to CData Connect Cloud from PowerApps.
At this point, you are ready to connect to your Couchbase data from Microsoft Power Apps.
Connecting to Connect Cloud from Power Apps
Because CData Connect Cloud looks like a SQL Server database in the cloud, we can use the SQL Server connector in Power Apps to integrate Couchbase data into your business apps.
-
- Log into Microsoft Power Apps
- Click Dataverse > Connections > New Connection
- Select SQL Server
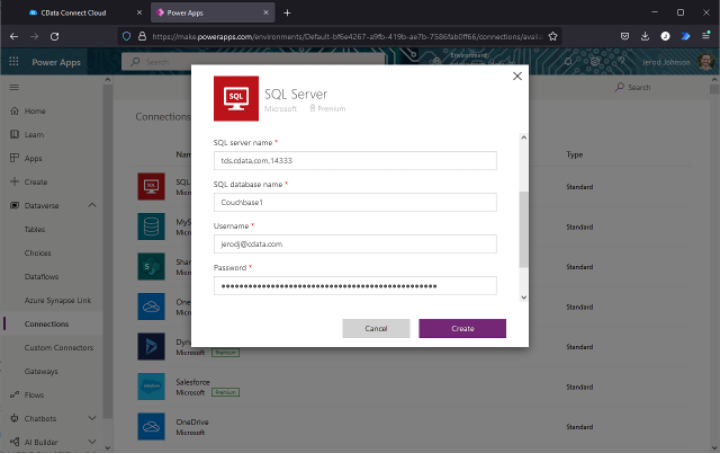
- In the Connection wizard, set:
-
-
- Authentication type to SQL Server Authentication
- SQL server name to tds.cdata.com,14333” (note the non-default port)
- SQL database name to the name of your Couchbase connection (e.g., Couchbase1)
- username to your Connect Cloud username (e.g., user@mydomain.com)
- password to the PAT for your Connect Cloud username
- Click Create
-
Once the connection to CData Connect Cloud is established, you are ready to build business apps from Couchbase data.
Building a Business App from Couchbase Data
The last part of this walkthrough involves integrating Couchbase data into a business app built in Power Apps.
-
- Log into Microsoft Power Apps
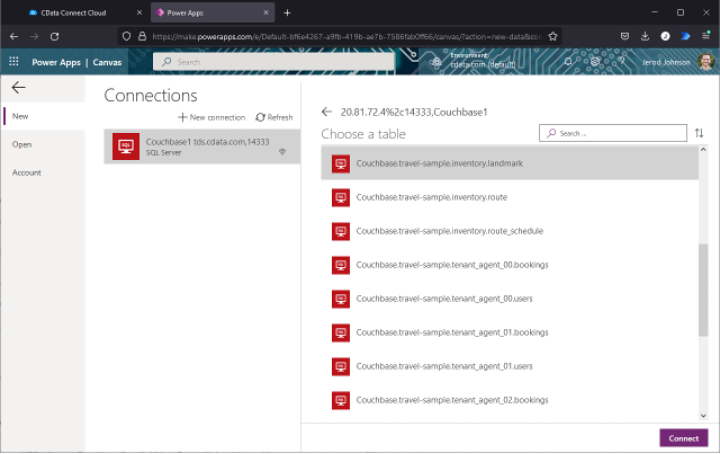
- Click Create and select SQL
- Choose your CData Connect Cloud Couchbase connection, choose a table, and click Connect
-
- Update the Browse Screen to use your fields of choice.
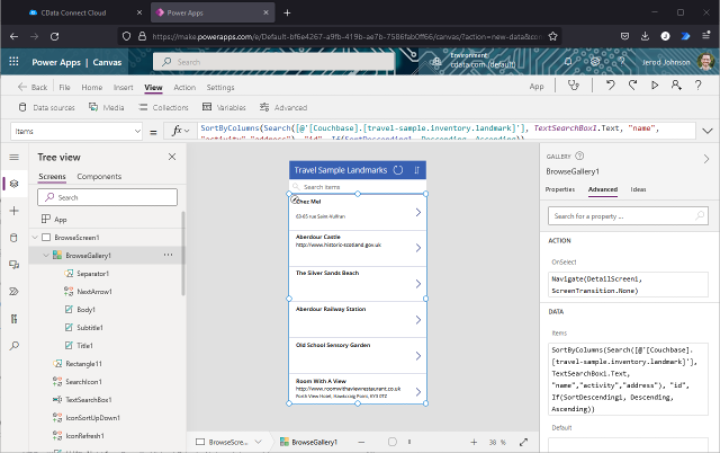
-
- Update the Detail Screen to use your fields of choice.
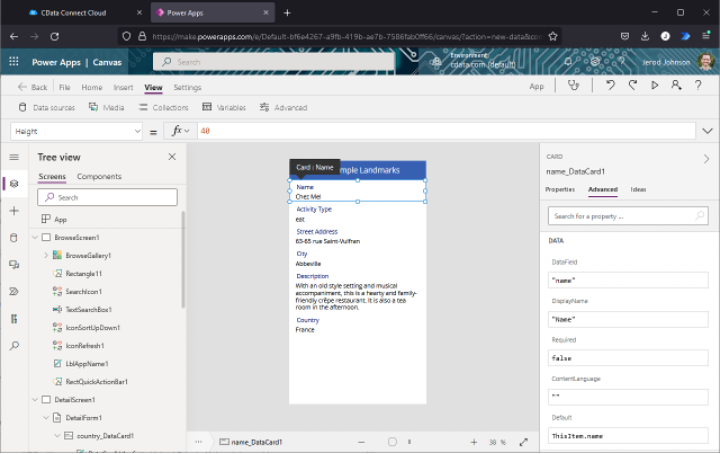
- Update the Detail Screen to use your fields of choice.
At this point, you will have created a business app with little to no code that has a direct connection to live Couchbase data. You can even update the app to include write-back support, using CData Connect Cloud’s bidirectional connectivity to Couchbase Capella. Employees can review, analyze, and update business data from wherever they are.
Keep learning
-
- Try CData Connect Cloud for free
- Start a 30-day free trial of Couchbase Capella